
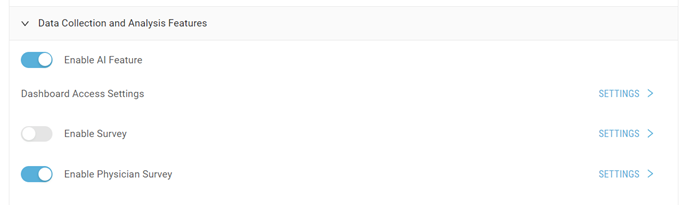
Data Collection and Analysis Features
This section allows you to enable our AI feature for patient identification, view dashboards, and customize data collection methods, including sending electronic surveys to the patients and physicians.
AI Feature
- Toggle “Enable AI Feature” to ON to turn on the Artificial Intelligence (AI) Feature for patient identification.
Dashboard Access Settings
- From the Dashboard Access Settings, click on “Settings” to configure access for different roles.
- Check the box to grant specific role access to the dashboards.
Patient Survey
- Toggle “Enable Survey” to ON to enable electronic surveys.
- Click “Settings” to configure the patient survey.
- Under “Survey Settings” tab, check the boxes to select applicable settings for your study:
- “Enable Survey”
- “Send Email Automatically” and decide if the email should be sent to us or the patients.
- “Send Thank You Email”
- “Enable Send Reminder” and then choose the reminder frequency: Daily, Weekly, or Monthly.
- Enter the survey welcome message in the provided text box.
- Email Templates
- Click “Patient Email” hyperlink to personalize the email to the patient.
- Click on the
to modify the patient’s email. Here, you can alter both the subject line and the content.
- Once done, click on the
to review the email.
- Repeat the above steps to personalize the “Patient Thank You Email”.
Physician Survey
- Toggle to enable the “Enable Physician Survey” then click the “Settings” button.
- Next, update the settings in both the Required Configurations” and “Additional Settings” tabs to meet your study requirements. Follow these steps:
Required Configurations:
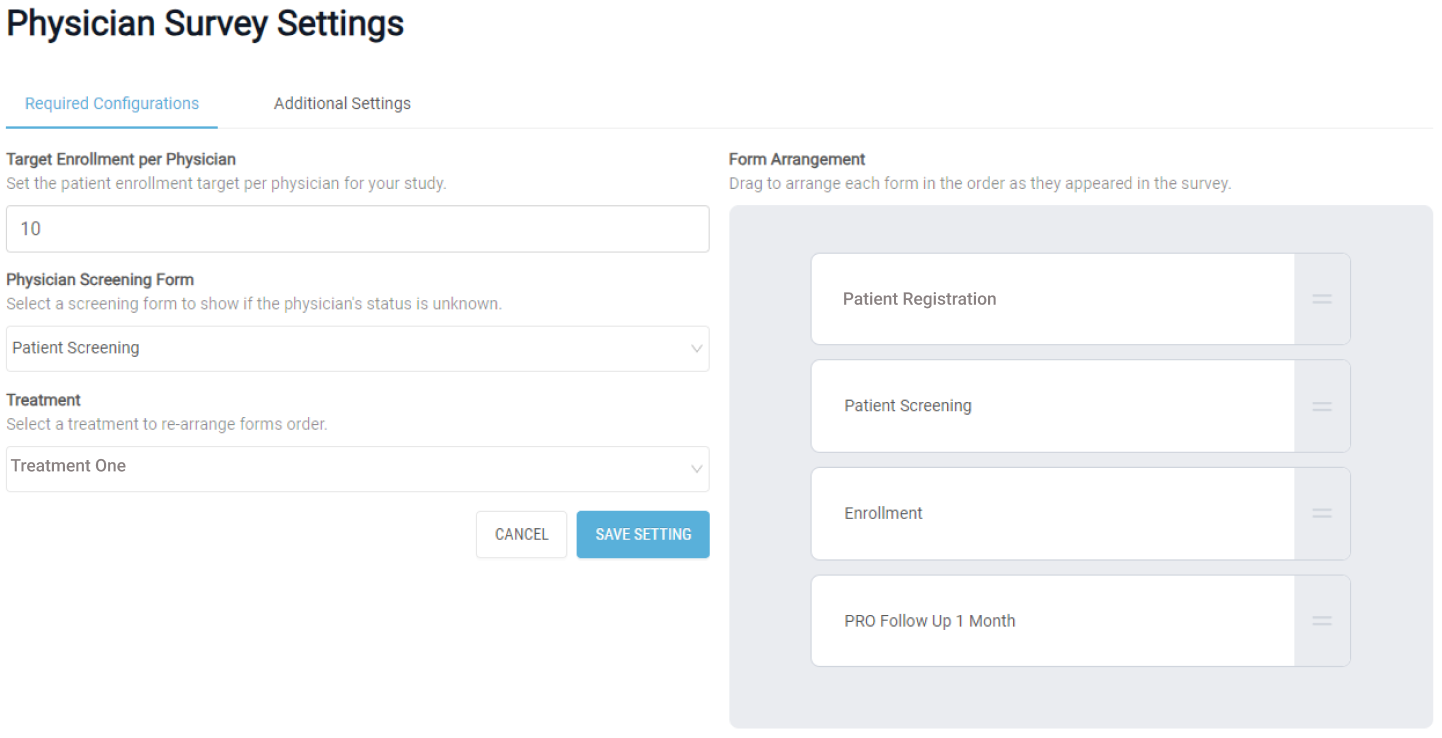
1. Set the Target Enrollment per Physician.
- Enter a number between 0 and 250 in the designated field. This sets the target number of eligible patients each physician can submit for your study. It’s important to note that this is a global value, meaning all physicians will be limited to this number of eligible patients.
2. Choose the Physician Screening Form
- Navigate to the “Physician Screening Form” section. Click on the drop-down menu then select the relevant physician screening form from the list.
3. Determine the Treatment
- In the “Treatment section, click on the treatment name you wish to assign. You can also rearrange the order of the forms to reflect their appearance in the survey.
4. Organize the Forms for the Physician Electronic Survey
- Go to the “Form Assignment” section. In this section, organize the forms in the order you want them to appear in the Physician Survey. To arrange the form, hover over it and drag it up or down as desired.
- Once you’re satisfied with the arrangement, click on the “Save Setting” button to finalize the changes.
- Per your CRF, the forms are typically in the following order to screen and collect data for each patient:
- Registration
- Patient Screening
- Enrollment / Treatment
- Follow-Ups / PRO
- Per your CRF, the forms are typically in the following order to screen and collect data for each patient:
Additional Settings:
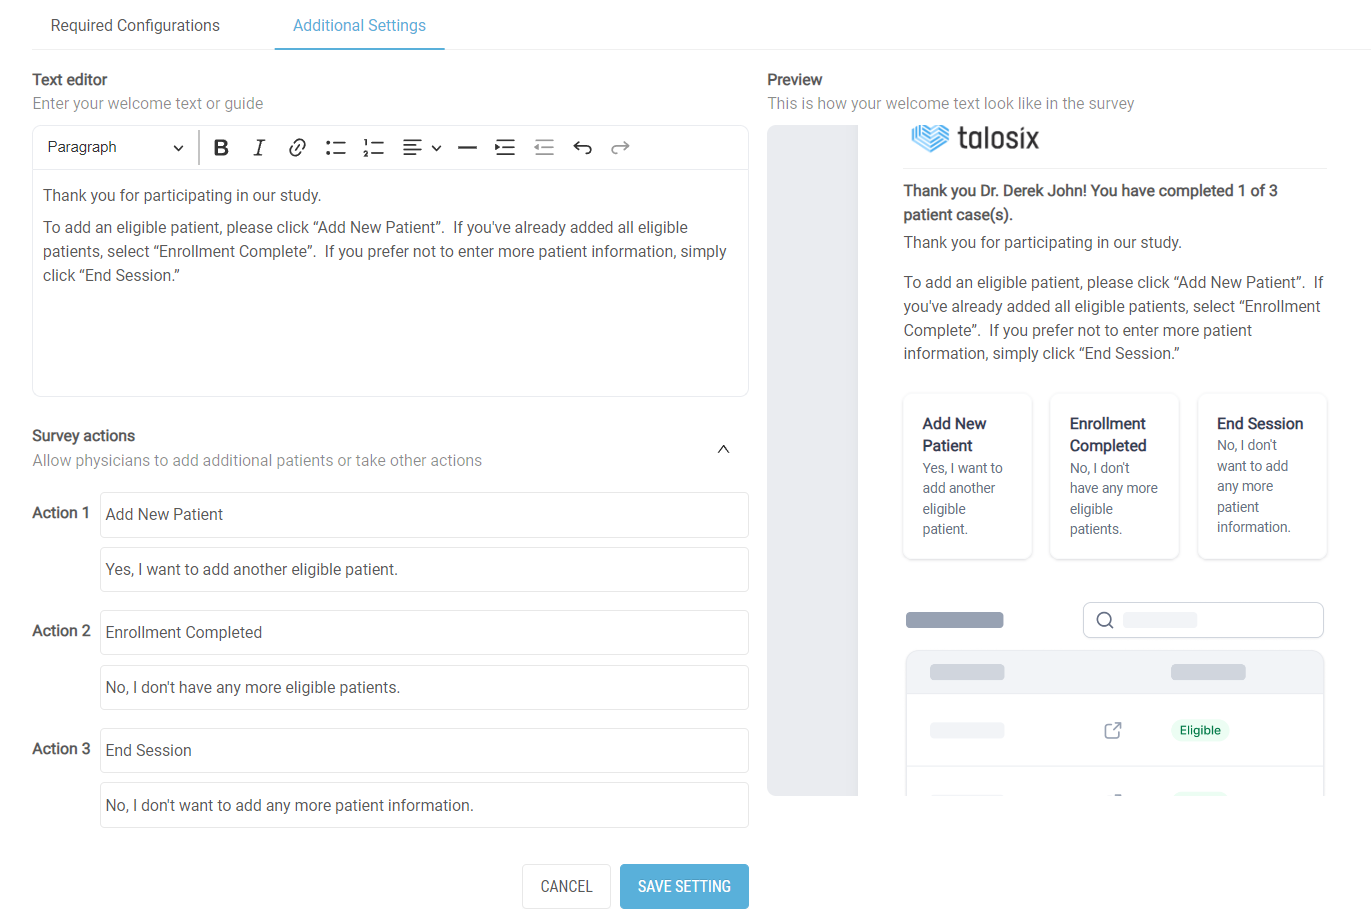
1. Add a Welcome Message
- Enter your welcome message and instructions for the physician in the “Text editor” section. For instance, consider including the study criteria and instructions in this section. Preview the welcome text directly within the survey using the “Preview” component on the right.
2. Incorporate Survey Actions
- In the “Survey Actions” section, click on the down-arrow button to reveal additional survey actions that can be added to the Welcome message. Here, you can customize the text for each action as a card component and add them directly to your physician survey. The logic for these buttons is as follows:
- Action 1: Add New Patient. Allows the physician to add an eligible patient directly from the survey.
- Action 2: Enrollment Completed. Lets the physician indicate that they have completed the enrollment.
- Action 3: End Session. Allows physician to inform the system that they do not intend to add another eligible patient.
- After ensuring everything is setup to your preference, click on the “Save Setting” button to apply the changes.