
Query Management
Data Monitors are responsible for conducting data validation based on the parameters outlined in the Data Safety Monitoring Plan (DSMP). Queries are generated by Data Monitors during the validation process. Follow these guidelines to effectively manage queries on our platform.
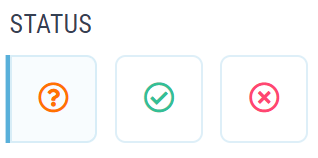
Icon Legends


Before you begin
- Verify the data to be reviewed based on the Data Safety Monitoring Plan.
Add Query
To add a query to a patient record,
1. Select the patient or enter the Unique Patient ID and click Search.
2. Choose the appropriate form type for data accuracy monitoring.
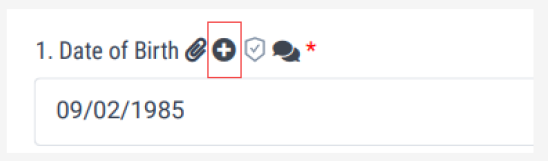
3. To address discrepancies or seek clarification, click the cross/plus icon next to the relevant question to add a query.
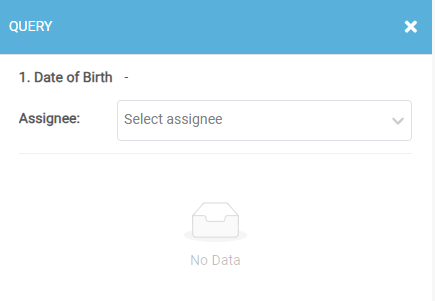
4. Assign the form to the original data entry person or the relevant user from the list.
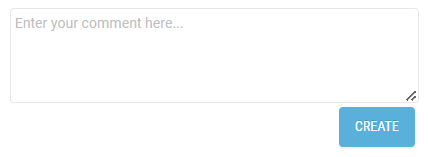
5. Enter a comment explaining the information requiring clarification, then click Create.
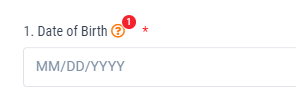
6. A successfully created query will display an orange question mark icon with a number next to the question.
After completing queries for all patients, navigate to the query management tab. Click the orange question mark icon under Status and select the assignee. Verify that all queries have been created accurately.
Approve/Reject Query
To approve or reject a query:
- Navigate to Query Management.
- Open the query that needs review.
- At the bottom of the query form, click either "Approve" or "Reject" depending on your decision.
- In the comments box, enter an explanation for your decision. This step is optional.
- If any supporting documents are required, click the upload button and select the files to attach.
- Once you have entered any necessary comments and attachments, click the "Submit" button to complete the approval or rejection process.
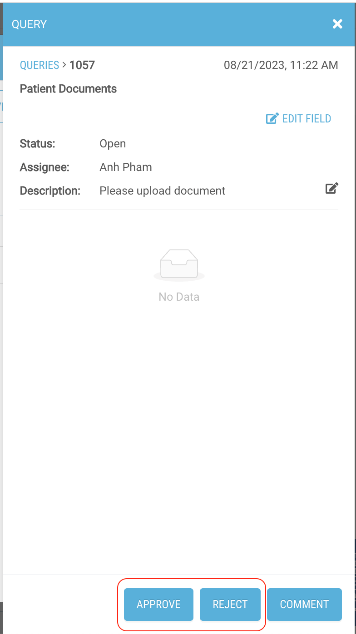
The query requester will receive notification of your decision along with any comments or documents you provided.
Respond to a query
To respond to a query:
- Navigate to Query Management in the left menu.
- Open the query that requires a response.
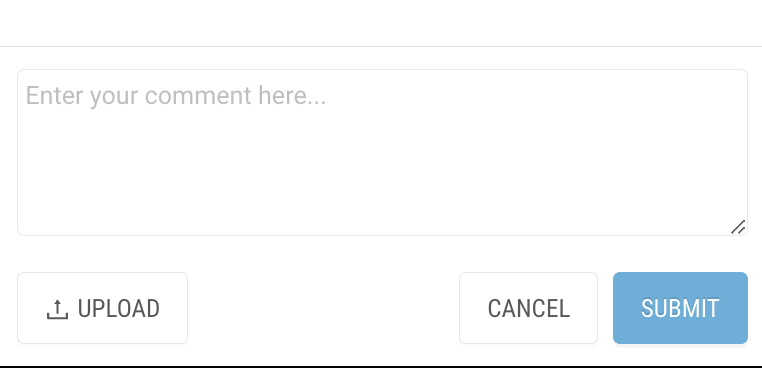
- At the bottom of the query form, click the "Comment" button.
- In the comments box, type your response to the query. Provide any information requested or explain next steps, as needed.
- If you need to attach any files or documents, click the upload button and select the files to include with your response.
- Once you have entered your comment and attached any necessary documents, click the "Submit" button to send your response to the query requester.
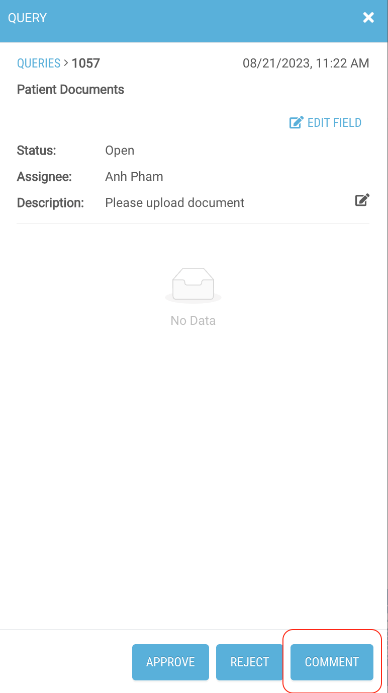

The requester will receive your comment and any attached documents right away. The query will remain open until the requester is satisfied or closes it. You can continue to respond as needed until the query is closed.