
Database Versioning
Overview
Database versioning moves study build changes from Test to Live in two controlled steps: sign off a draft version, then migrate it to Live. Both happen on Admin Tools > Study Version Management, opened from the Test environment of the study.
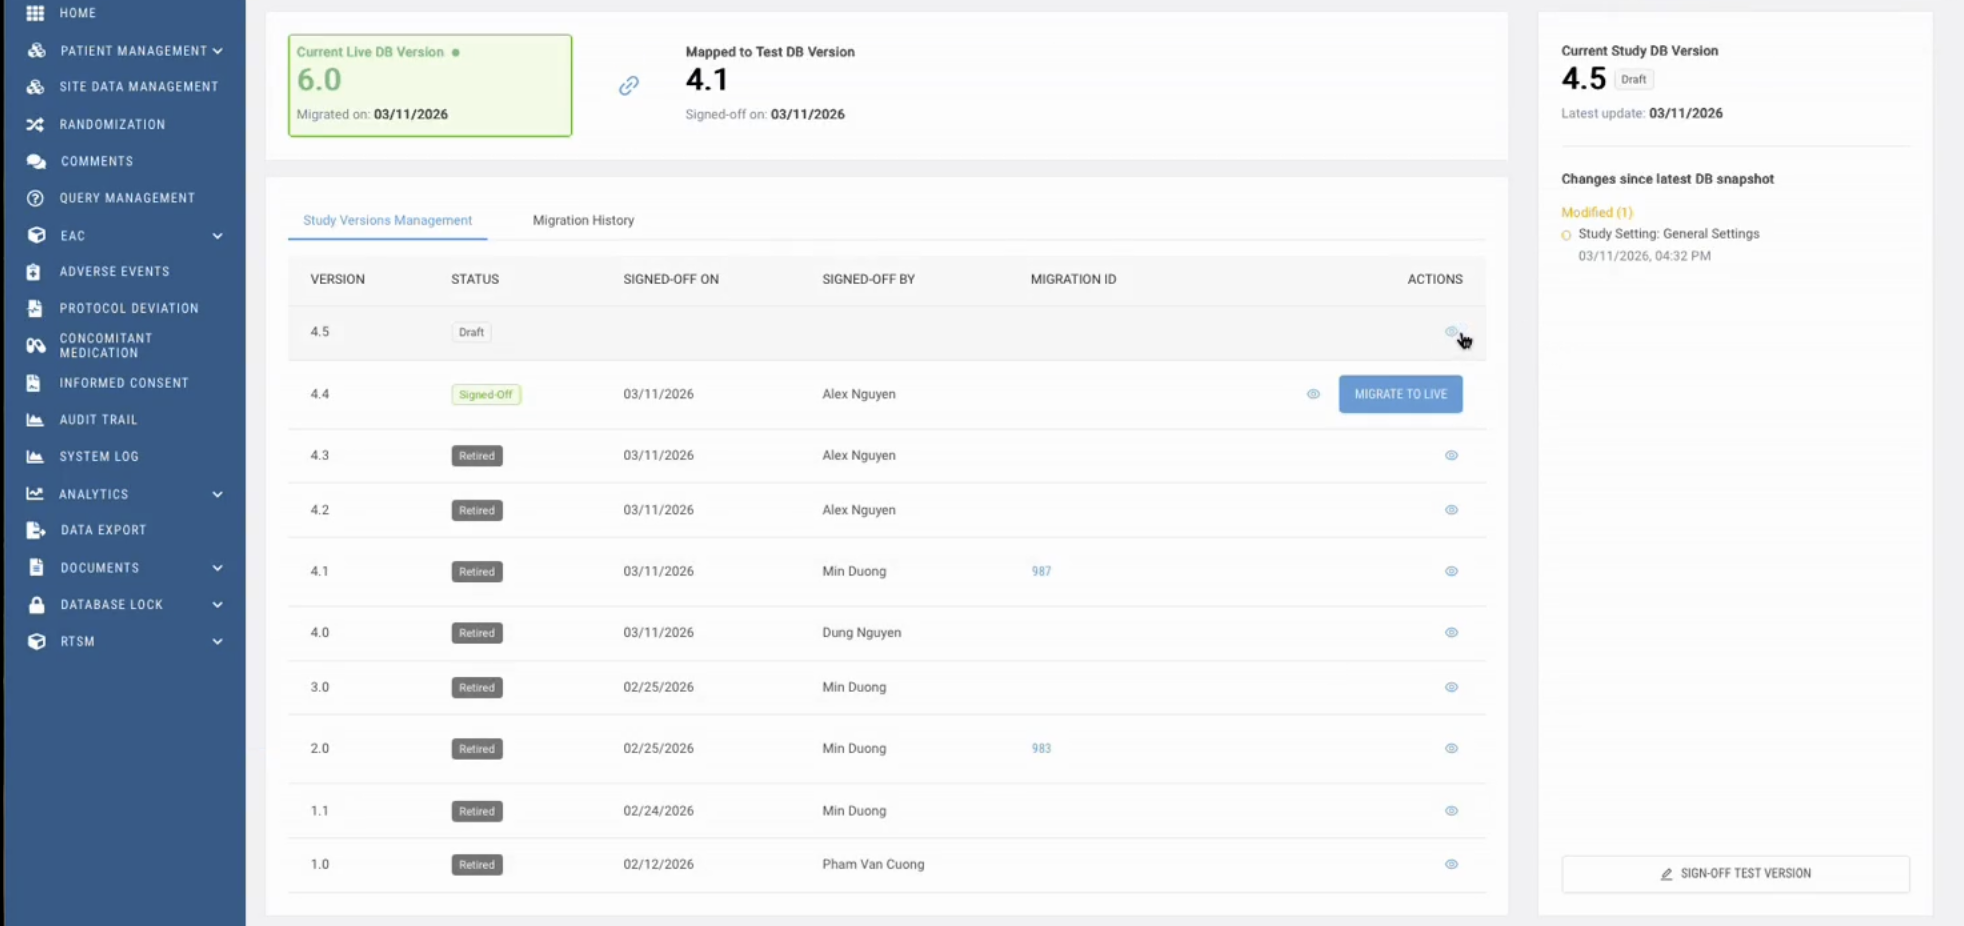
Each version moves through three statuses:
| Status | Meaning |
| Draft | Test changes not yet signed off; still editable |
| Signed-Off | Reviewed and e-signed; ready to migrate to Live |
| Retired | Replaced by a newer signed-off version |
Review and sign off
Signing off locks a Draft version's changes and makes it ready to migrate. You review the changes, e-sign, and re-enter your credentials.
- In the Test environment, open Admin Tools > Study Version Management.
- Find the Draft version at the top of the list. The right panel lists what changed under Changes since latest DB snapshot (e.g. Study Setting: General Settings).
- Click the eye icon in the Actions column to open Review Study Version. You can also click SIGN-OFF TEST VERSION in the right panel.
- Review the changes on each tab: Study Settings, Forms, Treatments/Cohorts and Visits. Items with a Changed At timestamp were modified in this version; use the page arrows to see all settings.
- Click SIGN OFF.
Migrate to Live
Migration applies a Signed-Off version to the Live study and cannot be undone. Only a Signed-Off version shows the MIGRATE TO LIVE button.
Before you migrate:
- Tell site users about the outage window.
- Ask users to save any work in progress; unsaved changes will be lost.
- Confirm the right version is signed off and its changes were reviewed.
- Open Admin Tools > Study Version Management.
- On the Signed-Off version, click MIGRATE TO LIVE.
- Read the Migrate to LIVE Environment warning:
- Any unsaved changes will be lost.
- Live forms will be updated with the latest changes. This action cannot be undone.
- Click START MIGRATION to continue, or CANCEL to stop.
- On Review your migration, check the Migration Items list. It shows each change that will be applied to Live (e.g. Study Settings: General Settings).
- Under Confirmation, type your full name. START MIGRATION stays disabled until you do.
- Click START MIGRATION.
- After the migration finishes, check that Current Live DB Version and its Migrated on date have updated, and that the migration is listed under the Migration History tab.